Spray foam insulation is becoming a popular, cost-effective way to insulate homes, workshops, and more. However, the investment in spray foam can be wasted if the product isn’t applied safely and properly. We’ve put together some of our top tips for those considering the use of spray foam insulation for their next insulation project.
1. Use conservative estimates when determining how much foam spray to buy
When you shop for spray foam insulation, you’ll likely see amounts advertised in a “theoretical yield” of board feet. You should almost always buy more than what you need in terms of board feet because the theoretical yield calculations are made in ideal spraying conditions in a lab setting. The actual amount you’ll get out of any given can or kit will be less coverage than the theoretical yield advertises. This information may increase the budget or scope of the project and create additional waste to dispose of, but it is far better to have too much spray foam than to have too little.
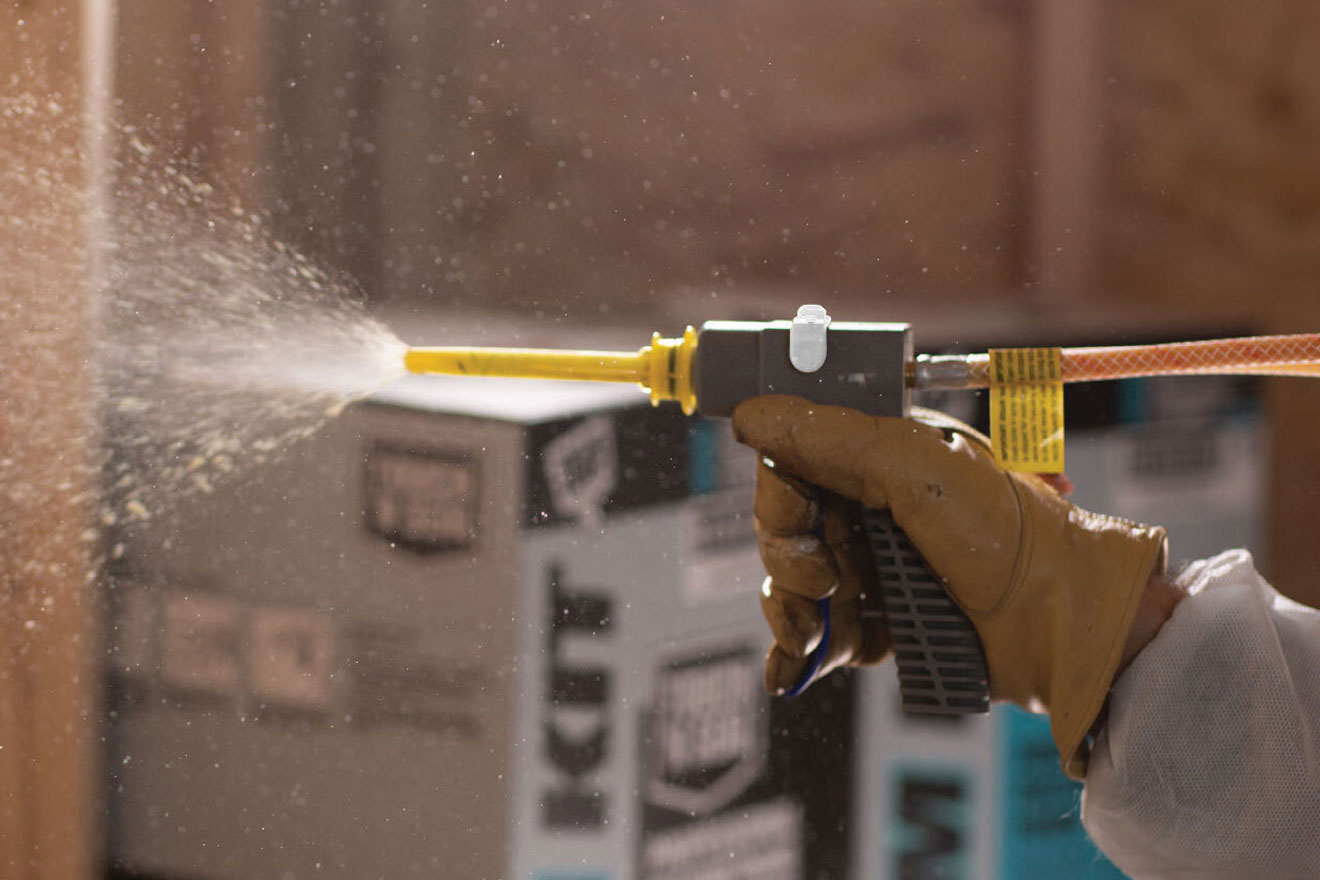
2. Wear the proper protective equipment
Spray foam can get quite messy and involves chemicals that are dangerous if inhaled! Once you’ve invested in your new insulation, you’ll also want to invest in the proper protective equipment like coveralls with a hood, wrap around goggles, a respirator, and chemical-resistant gloves. Wear old shoes that you don’t mind getting messy. As a general rule of thumb, once spray foam cures it has to be scraped off, so keep anything you want to keep free of foam away from the spraying area.
3. Have a trashcan or box handy for when you start spraying
Spray foam can get quite messy! Once you’ve got your protective equipment on, you’ll want to make sure there’s a proper chemical mix to prevent issues with poor foam quality and potential toxicity issues. To do so, point your spray gun into a trashcan or empty box, and pull the trigger until you’re sure you’ve got a proper chemical reaction and that the spray is flowing properly. Once it’s flowing well, you can start spraying!
4. Make sure that you are operating in the appropriate temperature
Spray foam insulation is sensitive to specific temperature ranges, and making sure that you’re operating your kit in the right temperature conditions will go a long way in ensuring proper application. The surface or substrate you are spraying on should be within the guidelines that are set by the manufacturer. This temperature range will be provided in your product’s manual or on the can of the product itself. If surfaces are too cold, there will likely be moisture present. If they are too hot the foam can cure too fast, resulting in a crusty and cracking finish that doesn’t give you the insulating qualities you’re after.
5. Make sure your spraying surface is dry
If your application surface is wet, it’s highly likely that your spray foam won’t adhere properly. If it doesn’t adhere properly, you’ll get a big runny mess to clean up and will have spent the money on the foam only to see it go in the trash! If the foam is being applied to a room to help with humidity issues, it may be worth investing in a dehumidifier to run for a considerable amount of time before spraying to ensure proper dryness. Invest in and use a moisture meter if you suspect that you may be dealing with a damp surface.
6. Wait until foam is dry to remove mistakes or messes
It can be tempting to want to immediately correct any mistakes you make while spraying, but patience is a virtue when it comes to spraying foam! If you make a mistake, let the foam dry and cure. It will be much easier to scrape away a dried mistake area that to to wipe it up while wet and spread it further around, making cleanup once it’s dry even harder. If you do handle foam while wet, be sure to use plenty of clean rags and an acetone spray to remove uncured foam.
7. Have a cleaning solution ready for your spray nozzle or gun
Ideally, your spraying session should be enough time to fully complete your project and you shouldn’t need to stop much. However, sometimes you may be working with a large project area or may be working on multiple projects that require stops. If you have to stop spraying and re-start the process elsewhere, be sure that your nozzle is properly cleaned before you resume spraying. It’s easy for unused foam to cure inside the nozzle and clog the tip, resulting in an uneven spray pattern and a low quality end-result.
You will generally have a 20-30 second window between spraying before the nozzle will start to clog up. Thankfully, nozzles can be cleaned with the use of a proper cleaning product. Most cleaners are acetone based and will break up the foam/rinse it out of the nozzle, allowing you to resume spraying using the same nozzle. If a cleaner isn’t readily available, you may need to use a new nozzle and dispose of the old one.
8. Work slowly in small increments, while giving time for each lift to cure
Spray foam expands over time, and each layer of foam you spray is called a lift. When you’re spraying, make sure to work quickly in small increments and allow the foam time to expand and cure. If foam continues to be applied on top of a lift of uncured foam will result in a loss of volume and a loss of all those insulating qualities and R value that likely attracted you to spray foam insulation in the first place. Most foams have a limit to how thick they can be applied as well, so be sure to take special heed of any instructions along those lines when reading your product instructions/manual.